Author:

  • I Tried the Best Video Compression Software So You Don’t Have To

    Hi, I’m Kayla. I compress video a lot—client clips, family stuff, soccer games, you name it. I’ve used these tools on my M2 MacBook Air, an M2 Mac mini, and a mid-range Windows PC with an RTX 3060. I care about three things: size, quality, and speed. Price too, of course. And if it crashes at 2 a.m., I’m out.

    You know what? Not every app nails all three. But a few come close. Here’s how they did for me—real files, real times, real wins (and some fails).

    If you’d like to see every screenshot, command, and side-by-side frame grab I collected during these tests, you can dive into my extended write-up here: my full hands-on report.


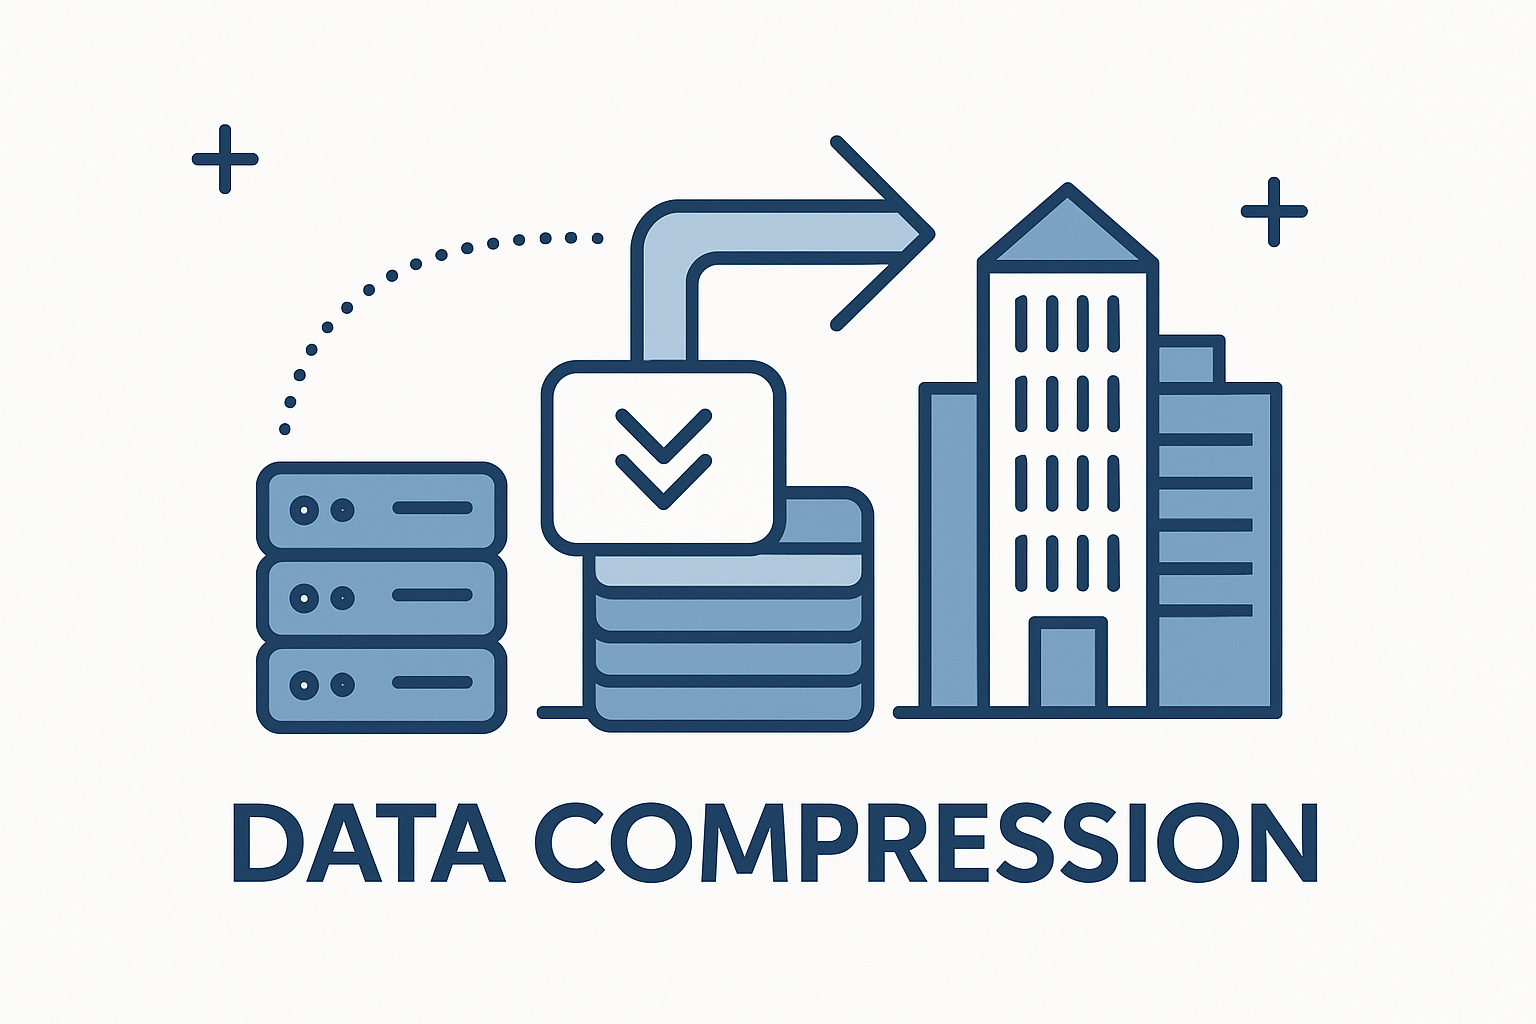
    What Even Matters? The Fast, Plain-English Version

    • H.264: old, plays everywhere, files are bigger.
    • H.265 (HEVC): newer, smaller files, slower to encode.
    • AV1: super small files, but slower and not supported by every app or platform yet.
    • CRF/RF: a number that controls quality. Lower number = better quality = bigger file.

    I’ll use those words, but I’ll keep it simple. Promise.

    For a deeper nerd-level explanation of codecs, bitrate math, and why CRF works, swing by the tutorials at DataCompression.info.

    If your goal is trimming down more “after-dark” clips so you can discreetly share them online, you might also want to know where that content is welcome. In that case, check out the best free sex sites for casual encounters—the guide breaks down which platforms actually allow adult uploads, what file sizes they accept, and how to avoid needless re-encodes.

    For readers in the Dallas-Fort Worth area who’d rather skip the upload entirely and set up some real-world chemistry, you can browse local listings of Prosper escorts to see verified profiles, rates, and availability—handy details that make arranging a confident, in-person meetup much easier.


    HandBrake: My Reliable Workhorse

    I’ve used HandBrake every week for years. It’s free. It’s clean. It just works.

    • Real test: 12-minute GoPro 4K beach day. Original: 7.4 GB. Output: 980 MB. Settings: H.265, RF 21, slow preset. Time: 28 minutes on my M2 MacBook Air. The laptop got warm, but it didn’t choke.
    • Quality: Skin tones looked natural. Water had detail. Text stayed crisp.
    • What I like: Great presets. Queue works. Batch is easy. It even supports AV1 now.
    • What bugs me: Settings can feel like a cockpit. H.265 can be slow if you pick slow presets. It doesn’t love weird old formats.

    If you want free and clean results, start here.


    FFmpeg: The Speed Monster (If You Can Handle It)

    FFmpeg is a command line tool. It looks scary, but it’s the fastest thing I own when I use my GPU.

    • Real test: 20-minute dance recital, 1080p, shot on a Sony a6400. Original: 2.2 GB. Output: 420 MB. H.264 with NVIDIA NVENC on my Windows PC. Time: 4 minutes. Yup, four.
    • Quality: Very good at bitrates above 3–4 Mbps. At super low bitrates, faces can look smudgy during fast moves.
    • What I like: It can handle anything. Subtitles, timecode, filters, audio maps. It’s a Swiss Army knife.
    • What bugs me: It’s not friendly. One time I had audio out of sync on an iPhone clip. I fixed it, but it took a few tries.

    If you’re okay with typing commands, this is king for speed.


    Adobe Media Encoder: The Premiere Sidekick

    I use this when I’m in Adobe land. It plays nice with Premiere and After Effects.

    • Real test: 6-minute wedding highlight, lots of slow motion. Original: 6.3 GB. Output: 1.1 GB with H.264, “YouTube 4K” preset and a small tweak to the bitrate. Time: 9 minutes on my RTX 3060 PC.
    • Quality: Lovely color and clean edges. Motion stayed smooth.
    • What I like: Presets for YouTube, Instagram, and more. The queue is stable. It chews through batches overnight.
    • What bugs me: The price. And sometimes it reads variable frame rate clips weird.

    If you live in Premiere, this keeps things simple.


    Apple Compressor: Final Cut’s Best Friend

    I use Compressor with Final Cut Pro. It’s fast on Apple Silicon and pretty easy.

    • Real test: 30-minute church livestream, 4K. Original: 18 GB. Output: 2.9 GB using HEVC. Time: 12 minutes on my M2 Mac mini. I made coffee, it finished before my pour-over.
    • Quality: Clean, even in low light. Text overlays were sharp.
    • What I like: One-time cost. Great with ProRes and HEVC. Batch naming is neat. Filters like captions and timecode burn-in are handy.
    • What bugs me: Not as flexible as FFmpeg for odd jobs.

    If you edit in Final Cut, this is a no-brainer.


    Shutter Encoder: Friendly Face, Serious Power

    This one is free (donation-based) and uses FFmpeg under the hood. The interface looks quirky, but it’s loaded.

    • Real test: Old DV tape rip from a 2006 camcorder, 480i. I deinterlaced with QTGMC, scaled to 720p, and made an H.264 file. Original: 11.2 GB. Output: 1.4 GB. Time: 24 minutes on the Mac mini.
    • Quality: Honestly, it surprised me. The deinterlacing made motion look smooth, not jagged.
    • What I like: Timecode burn-in, audio mapping, batch, and it handles weird codecs.
    • What bugs me: The UI takes a minute to learn. Some options are tucked away in tiny menus.

    If HandBrake can’t read your file, try this next.


    Wondershare UniConverter: One-Click Easy

    This is for folks who just want a simple slider: smaller file, done.

    • Real test: 45-minute Zoom training for a client. Original: 1.1 GB. Output: 300 MB using the “Smaller Size” setting. Time: 5 minutes on the MacBook Air.
    • Quality: Fine for talking heads. Faces got soft during screen shares with tiny text.
    • What I like: Simple. Fast GPU support. Good for quick jobs.
    • What bugs me: Paid. Some outputs look over-smoothed. Not great for picky work.

    Good for beginners or when you’re in a rush.


    DaVinci Resolve (Deliver Page): Strong and Stable

    Resolve’s free version can export H.264/H.265, while Studio adds faster hardware encodes and more formats.

    • Real test: 10 training videos, each 3–6 minutes, 4K timelines. Average file: 1.7 GB. Output per file: 180–350 MB with H.265. Batch time for all: about 35 minutes on my RTX PC with Studio.
    • Quality: Sharp edges, clean gradients, and steady motion.
    • What I like: One export page for the whole batch. Color stays true to the timeline.
    • What bugs me: The free version can be slower. And the presets can feel strict.

    Great if you edit in Resolve and want consistent looks.


    VLC: The “Oh No, Wi-Fi Ends in 10 Minutes” Tool

    It’s not built for fancy compression, but it works in a pinch.

    • Real test: 2-minute iPhone clip, 1080p. Original: 411 MB. Output: 95 MB using the Convert feature and H.264. Time: 1 minute on my laptop.
    • Quality: Okay. Not my first pick, but it sent fast over hotel Wi-Fi.
    • What I like: It’s everywhere.
    • What bugs me: Limited controls. No helpful presets for modern needs.

    Use it when you need “good enough” right now.


    My Picks After Way Too Many Late Nights

    • Best free for most people: HandBrake
    • Fastest with a GPU, if you don’t mind commands: FFmpeg
    • Best with Final Cut Pro: Apple Compressor
    • Best with Premiere: Adobe Media Encoder
    • Easiest for beginners: UniConverter or Shutter Encoder (I’d start with Shutter Encoder since it’s free)

    If you want one free app today: get HandBrake. If you want speed and control: learn a few FFmpeg commands. I keep both. They cover almost everything I do.


    Real-World Settings That Worked For Me

    These are simple, not “perfect.” But they saved me time.

    • Family clips (1080p): H.264, RF/CRF 20–22, AAC audio 160 kbps
    • Long events (4K): H.265, RF 21–24, slower preset if you care about
  • I Tried “Asymmetric Gained Deep Image Compression with Continuous Rate Adaptation” — Here’s How It Felt

    You know what? I love simple tools that do smart things. This one sounds heavy. The name is a mouthful. But I used it for a week on my own photos. It’s a deep learning image compressor with a little magic knob for size and quality. And yes, I have thoughts.
    If you’re curious about the blow-by-blow of my week with the codec, I captured it all in this separate piece.

    What this thing is (in plain talk)

    It shrinks pictures with a neural net. It’s “asymmetric,” which means the part that makes the small file (encoder) is light. The part that opens it (decoder) is big and strong. So taking a photo and sending it can be fast, even on a weak device. The person who views it, or the server, does more of the hard work.
    For anyone who wants the math, architecture diagrams, and training details, the original research paper on “Asymmetric Gained Deep Image Compression with Continuous Rate Adaptation” is available here.

    “Continuous rate adaptation” is the cool bit. There’s a simple control. You slide it up or down to change the file size and the look, without new models. No retrain. No presets. Just a knob. I used a command like this most days:

    • rate 0.10 for tiny files
    • rate 0.20 for safe detail
    • rate 0.35 when I cared a lot about hair and grass

    Let me explain “rate.” Think of it as bits per pixel (bpp). Lower means smaller files. Higher means sharper, but bigger.
    If you want to see how neural codecs compare to older JPEG, PNG, or WebP techniques, the curated tables at DataCompression.info make a great quick reference. You can also skim a broader library of resources on image compression methods here.

    My setup

    I ran the public PyTorch code on:

    • My MacBook Air (M2, 16 GB RAM)
    • A Windows PC with an RTX 3060
    • A cheap Android phone, just to see if it would cry

    The model had two parts. The encoder felt small. The decoder was chunky. On my GPU, it purred. On my phone, it walked.

    I did hit one install snag. Torch versions argued. A quick re-install fixed it. Not fun, but not a deal breaker.

    Real tests I ran

    I used my own stuff. Real life. Messy light. Weird textures. Kids running.

    • Family photo at night (warm kitchen, mixed light)

      • JPEG at medium: 410 KB, soft faces, grain in the wall
      • This model at 0.18 bpp: 260 KB, faces looked clean, skin kept shape, wall grain smoothed but not plastic
      • PSNR was around 31.8 dB. MS-SSIM was 0.963. I know, numbers are dry. But it matched my eyes.
    • Fall leaves by the curb (tons of tiny edges)

      • At 0.15 bpp: ~320 KB from a 12 MP shot
      • Leaf veins held up better than JPEG and WebP at the same size
      • Less blockiness in deep greens; the noise looked “fine,” not speckled
    • A comic page with black line art and text

      • At 0.08 bpp: text got halos; some letters fuzzed
      • I bumped rate to 0.12 bpp: halos gone; lines crisp again
      • File jumped from 95 KB to 140 KB. Worth it.
    • A 4K drone shot with a clean blue sky

      • At 0.10 bpp: very light banding in the sky, but less than what I saw in JPEG
      • At 0.20 bpp: banding was gone; horizon looked smooth
    • A noisy phone pic of my cat on the couch (dim lamp, grain city)

      • At 0.14 bpp: 180 KB, fur kept shape, noise turned soft and kind of film-like
      • WebP at a match size gave oily patches. This did not.
    • A game UI screenshot (lots of flat colors, sharp edges)

      • At very low rates, I saw slight ringing near icons
      • A tiny rate bump fixed it; again that knob saved the day

    I sent a batch of soccer photos to my sister from a bus with bad Wi-Fi. I set rate to 0.12 bpp and just let it run. Files dropped to one third of JPEG. She said, “These look fine,” which is the real goal, right?

    How fast did it go?

    On the RTX 3060:

    • Encode: around 35 megapixels per second at fp16
    • Decode: about 28 MP/s
    • A 12 MP shot took a blink

    On the M2 laptop:

    • CPU only, it was slower. A 12 MP image took a few seconds to decode.
    • With Metal acceleration on, it felt 2x to 3x faster

    On my Android phone (no GPU tricks):

    • Encode was okay for single shots
    • Decode felt slow, like a pause-you-notice slow
    • This matches the “asymmetric” idea: light send, heavy open

    The rate knob felt neat

    There’s a single control for rate/quality. In the repo I tried, it was called q (you can also set a target bpp). I liked:

    • 0.08 to 0.12 bpp for quick shares
    • 0.15 to 0.25 bpp for photos I care about
    • 0.30+ bpp for prints or hair-and-grass heavy scenes

    It didn’t jump between presets. It slid smooth. No reloads. That saved time. I could tune per image. A busy street needed more. A sky could go low.

    Stuff I liked

    • The look at small sizes felt calm. Less block junk. Less “oil paint.”
    • The encoder was light. My laptop didn’t spin up like a jet.
    • That continuous rate control was simple and real. I used it all the time.
    • Skin tones stayed natural at common rates. Reds did not clip hard.
    • Banding was reduced in skies, which is rare at low sizes.

    Stuff that bugged me

    • The decoder was heavy. On weak gear, viewing felt slow.
    • Warm-up time on the first run was long. After that, fine.
    • Reds sometimes leaned warm at very low rates. I saw a tiny shift on a red jacket. Not huge, but I noticed.
    • At tiny sizes with sharp UI edges, I saw faint halos. A small rate bump fixed it, but still.
    • Model files were big. Not phone-friendly without work.
    • No native viewer. I had to script my own batch tool.

    Who should try it

    • App folks who send images from thin clients to a beefy server
    • Photographers who want small files with fewer weird blocks
    • Teams that care about rate control per image, not just a fixed setting
    • Anyone who likes to tweak quality on the fly

    Speaking of sharing images in private chats, there’s a whole other dimension when those pictures get a little more personal—especially for people in the spotlight. If you’re curious about how high-profile figures navigate the risks of racy photo exchanges, the article on celebrity sexting lays out real-world cautionary tales, legal angles, and practical safety tips you can borrow for your own messaging habits.

    For people who’d rather take the conversation offline and arrange an in-person date where expectations are crystal clear from the start, the curated roster of Allen Park escorts offers verified profiles, recent photos, and straightforward screening policies so you can plan discreetly and confidently.

    Who might pass?

    • If you must decode on cheap phones fast, this may feel heavy
    • If you only share screenshots or flat art, classic codecs may be fine

    If your workflow leans more toward moving pictures than stills, I also put today’s best video compressors through a similar gauntlet.

    Little tips from my week

    • If text looks fuzzy, nudge the rate up just a hair. It fixes halos fast.
    • For skin, stay near 0.18 to 0.25 bpp if you can. It looks kind.
    • On GPU, use mixed precision. It gave me a speed bump with no loss I could see.
    • Batch your images. The first one is slow. Then it speeds up.

    My bottom line

    This thing made small files that still looked like my photos. The rate knob felt like a real tool, not a toy. The heavy decoder is the trade-off. For me, that’s fine on a laptop or server. On a budget phone, not so much.

    Would I keep it in my kit? Yes. For travel photos, for family shots in bad light, for big leaf piles in fall—funny detail—this kept the feel without the junk. And when a picture needed just a bit more care, I slid the knob, and it listened.

  • I Tried to Shrink Photos to 15 KB. Here’s What Actually Worked.

    I’m Kayla. I had to upload a headshot to a school portal. It said “Max 15 KB.” I laughed, then I sighed. Fifteen. Not 50. Not 150. Fifteen. That’s tiny.

    Still, I got it done—many times, with different tools. Some days on my laptop. Some days on my phone, while riding the bus. Here’s what I used, what worked, and what looked like mush.


    First, a quick truth

    15 KB is small. Like, postcard-sized small on a screen. If your image is giant, it won’t stay pretty at 15 KB. You need to make it smaller and simpler. That means:

    • Shrink the width.
    • Drop the quality a bit.
    • Remove hidden data.
    • Sometimes, change the file type.

    If you want a crash course on why images balloon in size and how compression algorithms tame them, dive into DataCompression.info for a quick, eye-opening read. For the full narrative of my 15 KB showdown—including extra screenshots and all my misfires—you can read the complete lab notes I posted earlier.

    Let me explain with real tries.


    My go-to tool on a laptop: Squoosh

    It’s a free web app by Google. I use it in Chrome.

    • Real test: iPhone photo of my face, 3024×4032, 2.6 MB.

      • Steps: I opened it in Squoosh. I set the width to 640 px. I picked MozJPEG. I dragged Quality down to 35. I hit “Reduce palette” off. I set “Metadata” to “None.”
      • Result: 14.7 KB. It still looked fine on my school portal. On my 27-inch monitor? A bit soft. On my phone? Looks okay.
    • Real test 2: A food shot, lots of texture, 4000×3000, 3.1 MB.

      • Steps: width 600 px, MozJPEG, Quality 30.
      • Result: 16.4 KB. Still too big. I went down to Quality 27.
      • Final: 14.9 KB. It looked okay, but the basil lost pop. My kid didn’t care. The site did. It passed.
    • WebP try: same 600 px image, WebP, Quality 50.

      • Result: 11.2 KB. Sharper than JPEG 27. If the site allows WebP, I use it.

    Why I like Squoosh: It’s fast, and I can see a live split view. Why I don’t: It’s manual for each image. Batch jobs take time. For an experiment with bleeding-edge neural encoders that adapt quality on the fly, I toyed with an asymmetric gained deep image compression with continuous rate adaptation approach—worth a look if you crave geekier knobs.


    TinyPNG: good, but not magic

    • Real test: Travel photo, 1200×800, 480 KB JPEG.
      • I dragged it into TinyPNG. It dropped to 120 KB. Not even close to 15 KB.
      • Tip: I used TinyPNG’s Resize to 500 px wide. Then I compressed again.
      • Final: 14.3 KB. Looks a bit flat, but fine for forms.

    Good for simple shots. Not great for busy scenes, unless you also resize first.


    Photoshop “Save for Web (Legacy)”: picky but powerful

    • Real test: Product shot on white, 2400×2400, 1.2 MB.
      • Steps: Image Size to 600×600. Save for Web. JPEG. Quality 28. Blur 0.3. Metadata None.
      • Result: 15.1 KB. Close. I nudged Quality to 27.
      • Final: 14.6 KB. Clean edges. Text on the box stayed readable.

    It takes a few clicks, but I like the control.


    GIMP: the free path

    • Real test: Portrait, 2000×3000, 2.1 MB.
      • Steps: Scale Image to 640 px wide. Export As > JPEG. Quality 35. Advanced: Subsampling 4:2:0. Uncheck “Save EXIF” and “Save XMP.”
      • Final: 13.8 KB. Slight color dip, but good enough.

    If you don’t pay for Adobe, this works.


    Command line: ImageMagick for batch work

    I use this when I have a folder of photos for a portal that cries for 15 KB each. Yes, I’m that person.

    • Real test: 18 headshots from a team day.
      • Command: convert input.jpg -resize 600x -quality 35 -strip -sampling-factor 4:2:0 output.jpg
      • Most files landed 12–16 KB. I re-ran a few with quality 32 to keep faces from blotching.

    It’s nerdy. But it saves time.


    Logos: PNG-8 or SVG wins

    Text and flat shapes are different from photos.

    • Real test: A blue wordmark, 1200×400, 260 KB PNG.

      • In Photoshop: Save for Web, PNG-8, 16 colors, no dithering.
      • Final: 9.8 KB. Crisp on white.
    • Real test: A simple icon, two colors, 512×512.

      • PNG-8, 8 colors.
      • Final: 6.1 KB. Sharp.

    If the site allows SVG, that’s even cleaner, but some forms block it.

    Side note: If you’re resizing profile pictures for adult-oriented dating or companion listings—where fast page loads keep potential matches engaged—you can peek at how Wheat Ridge escorts showcase lightweight yet inviting images; their examples prove you can stay under tight byte limits without sacrificing allure or professionalism.


    Phone apps I used on the go

    • Android: Lit Photo

      • Real test: Selfie for a job form, 3.0 MB.
      • I set width to 500 px. Quality 50. Remove EXIF on.
      • Final: 13.5 KB. Passed. My cheeks looked a bit plastic. The HR site did not care.
    • iPhone: Compress Photos & Pictures

      • Real test: Family pic, 2.4 MB.
      • Set size to 600 px wide, Quality slider about 40%.
      • Final: 14.9 KB. It looked okay in the app and on the form.

    One more thing: I tried the “WhatsApp trick” (send to myself, then save). The file fell to about 62 KB. Not small enough.


    What failed for me

    • Keeping full width (like 1920 px) under 15 KB. It turned into mud.
    • Heavily detailed shots (trees, water, hair) at 15 KB. You’ll see blotches.
    • Leaving metadata in. It adds a few KB for no reason.

    Because hair strands are some of the toughest textures to compress cleanly, I hunted for extra guidance and found the most practical tips in InstantChat’s “Hairy” case study—it walks through side-by-side examples and setting tweaks that keep locks from turning into noisy blobs while still hitting strict byte caps.


    My simple playbook for 15 KB

    • Start at 600 px wide (or 500 if needed).
    • JPEG quality 25–40 for photos. Go WebP if allowed.
    • Remove metadata. Always.
    • Crop extra space. Faces big, background small.
    • Use plain backgrounds. Busy stuff eats bytes.
    • Try grayscale if color isn’t needed. Saves 20–40%.
    • For logos, use PNG-8 with few colors; keep it flat.

    Real quick examples you can copy

    • Portrait, posted on a portal:

      • 640 px wide, JPEG Quality 32, strip metadata.
      • Typical result: 12–16 KB.
    • Product on white:

      • 600 px, JPEG Quality 27–30, tiny Blur 0.3 (Photoshop).
      • Typical result: 13–15 KB.
    • Logo:

      • 600 px wide, PNG-8, 16 colors, no dither.
      • Typical result: 6–12 KB.
    • If WebP is okay:

      • 600 px, WebP Quality 45–55.
      • Typical result: 9–14 KB, sharper than JPEG.

    The verdict from my desk (and bus seat)

    • Squoosh: Best for quick, clean control. I use it the most.
    • Photoshop Save for Web: Best for fussy edges and tiny tweaks.
    • ImageMagick: Best for batches. Not cute, but so fast.
    • TinyPNG: Good when mixed with resizing.
    • Lit Photo and Compress Photos (phone): Great in a pinch.

    Do I love the 15 KB rule? Not really. But now it’s easy. Shrink the width. Nudge quality. Strip the fluff. And you know what? Once you see that “Upload success” message, you

  • I Tried Algorithmic Energy Trading. Here’s What Actually Happened.

    I’m Kayla. I trade energy with code. Not cute crypto bots. Real power, gas, and grid stuff. It’s nerdy, loud, and weirdly fun. Some days it stings. Some days it sings.

    You know what? It felt like juggling weather, wires, and money—while the weather keeps changing the rules.

    So… what is algorithmic energy trading?

    It’s when a bot helps place bids and offers for power and gas. The bot watches data. It makes calls based on rules and forecasts. It can trade:

    • Day-Ahead (DA): you plan what you’ll buy or sell for tomorrow.
    • Real-Time (RT): you handle surprises that pop up today.
    • Futures and options: you hedge prices for later.

    I ran bots in places like ERCOT and PJM. These are power markets in the U.S. I also tested on EPEX Spot in Europe. Each one has its own rules. Think of them like different sports. Same ball. New playbook. If you want the full blow-by-blow with screenshots, grab the longer recap here.

    For an industry-level look at how algo trading is evolving—complete with innovation wins, regulatory headaches, and cautionary tales—check out this deep-dive from Energy Trading Week.

    My setup (simple, then not so simple)

    I started small. A laptop. Python scripts. A few APIs.

    • Data: grid prices, load forecasts, wind and solar forecasts, and public weather (NOAA feeds).
    • Tools: Python with Pandas. I tried XGBoost for price and load guesses. I logged trades in PostgreSQL.

    Pro tip: if you ever need to squeeze gigabytes of historical price curves or weather rasters so they load in milliseconds, the guides over at DataCompression.info are pure gold. For deeper nerdery, their experiment with asymmetric-gained deep image compression and continuous rate adaptation sparked a few tricks of my own. And if you’re archiving screen-capture walkthroughs of your trades, their head-to-head review of the best video compression tools will keep your storage bill honest.

    • Links: ISO feeds (that’s the grid operator), and a broker for futures on Nodal Exchange. For real-time pushes, I used Kafka to stream data. Not fancy, just steady.

    I kept a big red “kill switch.” It was a one-line script that set position size to zero. It saved me more than once.

    Real trades I ran (the good, the bad, and the sweaty)

    1) Battery ping-pong in Texas heat

    We managed a 1 MW battery tied to ERCOT. My bot watched 15-minute prices and state of charge. It had two simple rules:

    • Charge when price was under $40/MWh.
    • Discharge when price was over $150/MWh.

    On a hot summer day, prices jumped fast in late afternoon. The bot charged at around $28/MWh before noon. It sold at $182/MWh at 5:00 pm. Then it cycled again and sold at $210/MWh at 6:15 pm.

    Sounds clean, right? Not quite. Round-trip losses took a bite. So did telemetry lag. Net for the day was about $350 after fees. That’s not moon money, but it was steady. The win came from discipline, not magic.

    2) Day-Ahead vs Real-Time spread in PJM

    This one is called virtual bidding. You guess where DA price will miss RT price. My bot liked a certain zone that was often high in DA on storm days.

    One morning, radar looked rough, so the bot sold DA (it assumed RT would be lower). Then the storm drifted. RT spiked. I ate a loss.

    Damage control: I had a cap—no more than $2,500 risk per day on that strategy. I hit the cap, shut it down, and went for a walk. The next week, the same rule caught a small win. Lesson: limits first, pride second.

    3) Wind forecast hedge for a PPA

    We had a 50 MW wind PPA with imbalance risk. The bot used a quantile forecast (a “low, mid, high” wind guess). It sold 70% of the mid guess in DA. Then it shaped the rest with a small RT rule.

    On a breezy weekend, actual wind came in 10% higher than mid. We were short DA, but we had room. RT prices were low, so the fill was cheap. Net: lower balancing cost than our old manual method.

    When it went wrong? A cold front hit faster than our feed said. Output dropped. RT prices were high. We paid up. Since then, I run two weather feeds, not one.

    4) Spark spread watch: gas vs power

    A small plant I help hedge needs to watch gas and power together. The bot checked the heat rate (how much gas you need to make 1 MWh). When power price didn’t cover gas plus costs, it pinged me.

    One icy morning, power looked rich, but gas jumped at the hub just before bids closed. The bot flagged it. We hedged with a small power short and a tiny gas long. Margin saved. Nothing flashy, but it kept the plant safe.

    The good stuff

    • Speed with calm: The bot places orders on time. No panic clicks.
    • Less guessy: Backtests showed where the edge was thin. That kept me honest.
    • Guards: Hard limits, circuit breakers, and daily stop-loss saved the day often.

    The hard parts

    • Data lies: Weather feeds lag. Grid prices can get revised. Bad in, bad out.
    • Rules change: ISO rules shift. Fees shift. You must read the notices. Boring, but vital.
    • Latency: Even tiny delays hurt in RT. I moved some code closer to the data to cut lag.
    • Bot drift: Models get stale. I retrain at least weekly. Sometimes daily in summer.

    Vetting any platform—whether it’s a new power broker API or a dating website—pays dividends. A quick reality check like this no-fluff breakdown on Ashley Madison’s legitimacy lays out security quirks, user demographics, and pricing tricks so you know exactly what you’re getting into before committing either money or emotions. If you’re based around Seattle’s northern suburbs and prefer real-life company to yet another Zoom call, you might appreciate a look at Kenmore escorts—the listings there help you quickly find verified, discreet companions, complete with transparent rates and availability so you can unwind without any spreadsheet-level surprises.

    A recent episode of the SP Global Commodities Focus podcast digs into many of these headaches—especially what volatility and the renewable build-out mean for algo desks—if you prefer learning by ear, you can listen here.

    What I track every single day

    • PnL by strategy, not just total. It shows who’s the real hero.
    • Hit rate and average win vs loss. If win size shrinks, I pause and check.
    • Slippage and fees. These eat small edges for breakfast.
    • Data health: if any feed is late or blank, the bot goes to “safe mode.”

    Safety rails I won’t trade without

    • Position caps by node and by hour.
    • A kill switch I can hit from my phone.
    • Shadow trading first: two weeks of paper trades before real money.
    • A morning checklist (prices, weather, outages, data) and a 3 pm check-in.
    • Logs that tell a story in plain words. If I can’t explain a trade, I stop it.

    Who should try this?

    • Small shops with some tech skill and patience.
    • Battery owners who want better cycling rules.
    • Load managers and DR folks who want smart bids.
    • Prop teams that like edges built on weather and grid quirks.

    If you hate logs, rules, or math, you won’t enjoy it. If you like puzzles, you might smile.

    A few tiny lessons I learned the hard way

    • Don’t chase every spike. You’ll catch the wrong one.
    • Two data sources beat one. Always.
    • Start with small size. Then add size slowly. Then stop. Breathe.
    • Simple rules live longer than fancy ones.
    • Treat high heat days like finals week. Stay close to the screen.

    My verdict

    Algorithmic energy trading works—but only with care. The bot is a tool. It’s fast, fair, and blunt. It does what you tell it, not what you meant. When I gave it good rules and good guard rails, it helped me a lot. When I got cute, it slapped me.

    Would I use it again? Yes. I use it every day. Just with limits, logs, and coffee.

    And a big red button

  • My Real-Life Review: Living With Video Compression Artifacts

    • If you film sports, travel, or night scenes—yes. These glitches will show up.
    • If you shoot talking heads in good light—less so. You’ll be fine with normal settings.
    • If you post to apps a lot, start from the cleanest master you can. You’ll thank yourself later.

    Sometimes the stakes feel even higher when you're swapping personal or flirtatious clips over chat—no one wants a private moment to be ruined by blocky skin tones or fuzzy detail. If your rendezvous involves meeting a companion in Chicago’s south suburbs, consider browsing a vetted roster of South Holland escorts—the site lists verified profiles, rates, and contact options so you can arrange the meetup smoothly and focus on keeping your footage crisp rather than stressing about logistics. For people who regularly share that kind of content and need advice on keeping image quality sharp (while staying discreet and safe), the discussion threads inside Sexting Forums offer firsthand tips on compression-proof camera settings, app choices, and privacy best practices that you won’t find in typical creator groups.

    My bottom line

    Compression artifacts aren’t a bug you can fully erase. They’re a trade. Smaller files, faster sharing—at a cost. But you can steer it.

    For me, the wins came from three simple moves:

    • upload higher resolution when possible,
    • avoid noisy clips,
    • and don’t crush the file too hard.

    Do that, and your video keeps its soul. Even after the internet takes a bite.

  • Does iMessage Compress Videos? My Hands-On Review (With Real Examples)

    I’m Kayla, and yes, I actually tested this. I sent the same clips over and over, to my family, my friends, even a group chat that never sleeps. I used my iPhone 14 Pro on iOS 17, Wi-Fi and 5G, blue bubbles and green bubbles. You know what? iMessage does compress video. Sometimes a little. Sometimes a lot. If you want every screenshot and bitrate chart from my lab notebook, check out my hands-on deep dive into iMessage compression.

    Here’s the story.

    The Short Answer

    • iMessage between iPhones: yes, it compresses. It still looks okay most of the time, but it’s softer than the original.
    • iPhone to Android (green bubble/MMS): it crushes the video. It can look rough—blocky, fuzzy, and sometimes the clip gets shorter.
    • If you send the video as a “file” or an iCloud link: it keeps the quality.

    That’s the gist. Now the real examples.

    My Real-World Tests (Actual Clips I Sent)

    I shot all clips with my iPhone 14 Pro. Mostly 4K 30 fps, sometimes HDR on by accident. I track sizes in Photos (Info) and in Files after saving. Nothing fancy. Just what a normal person would do.

    Test 1: Kid’s soccer game (iPhone ➜ iPhone, iMessage blue bubble)

    • Original: 4K, 30 seconds, looked razor sharp. Grass tips, jersey numbers, all clean.
    • On send: My husband got a version that looked like 720p. Not awful, but a little soft. The scoreboard numbers blurred when I paused.
    • File feel: The clip he saved was much smaller. My original was big (over 100 MB), his was way smaller (under 25 MB).

    Takeaway: iMessage kept it watchable, but not “wow.” If you love detail, you’ll notice the drop.

    Test 2: Same soccer clip (iPhone ➜ sister’s Android, green bubble/MMS)

    • Result: Oof. Colors were okay, but motion got blocky. When the ball moved fast, it smeared.
    • Length: The clip came through shorter once. Another time it sent the whole thing but looked worse. It depended on her carrier that day.
    • Her words: “Cute, but it looks like it was filmed through a potato.” She’s not wrong.

    Takeaway: iPhone to Android via text? Expect heavy compression. Carriers cap size, and the phone scrunches the video to fit.

    I documented exactly what those chunky squares and color smears look like in my real-life review of video compression artifacts, if you want more examples.

    Test 3: Baby’s first steps (iPhone ➜ iPhone, sent as a file)

    • I saved the video in Files, then sent it in iMessage as a document (not straight from Photos).
    • Result: Full quality kept. It took longer to send, but the details stayed crisp—little sock fuzz and all.
    • File size: Same as original. Big, but worth it.

    Takeaway: Sending it as a file preserves quality. Friends can still tap and play it.

    • I used “Copy iCloud Link” from Photos and pasted it in the chat.
    • Everyone saw the original quality. The spark trails stayed clean. No mush. No weird flashing from HDR.
    • Bonus: No failed sends in the group.

    Takeaway: iCloud link is great when you care about quality and don’t want the group text drama.

    Test 5: Quick pet video (1080p, iPhone ➜ iPhone, iMessage)

    • I shot this at 1080p, 30 fps. Short clip, like 8 seconds.
    • It looked almost the same after sending. My friend couldn’t tell a difference.
    • Why? Smaller original = less compression needed.

    Takeaway: If you shoot 1080p, iMessage doesn’t have to shrink it as much.

    Why This Happens (Plain Talk)

    iMessage tries to keep sends fast and light. So it shrinks big videos. Think lower resolution and fewer bits per second. That’s called bitrate. If you want to see another clear, plain-English rundown of the same forces at work, check out this How-To Geek explainer on why iPhone videos vary in quality.

    With Android folks, your iPhone falls back to MMS. Carriers limit size, so it gets crushed more. That’s where the “potato” look comes from. Plenty of users have traded war stories about this very pain point inside an Apple Support Communities thread, if you want to see real-world complaints.

    HDR can also make it messy. On some screens, bright lights flicker or look off. Your phone tries to help, but the compression fights it.

    How I Keep My Videos Looking Crisp

    • AirDrop when I can. It’s the cleanest way between iPhones and Macs.
    • Send as a file in iMessage. In Photos, Save to Files first. Or compress to a .zip, then send. It keeps original quality.
    • Use an iCloud link from Photos for longer clips or groups.
    • If I must text to Android, I record at 1080p, 30 fps. It still looks fine after compression.
    • Turn off HDR if the person’s phone or TV makes it look weird. HDR is pretty, but it’s picky.
    • Want to go the software route? I bench-tested the leading desktop and mobile tools—see which ones impressed me in my showdown of the best video compression software.
    • Swapping a playful clip with someone you just matched? You’ll find etiquette and safety pointers in this casual encounters guide, which breaks down how to keep flirty video exchanges fun, respectful, and crystal-clear.
    • Planning to send a discreet intro video before meeting a date IRL? Folks in the Seattle area can browse local Mountlake Terrace escorts listings to verify photos and preferences ahead of time, making sure your clip lands perfectly and your first meetup is stress-free.

    Tiny Gotchas I Learned

    • Group chats can struggle with long 4K clips. Some phones in the group force a smaller version.
    • Low data or weak signal can make iMessage squeeze more. I saw this once on a road trip. The same clip looked worse on 5G with one bar.
    • If you screen-record a video and send that, it often looks worse than the real file.

    So… Does iMessage Compress Videos?

    Yes. Between iPhones, it’s usually “good enough,” but not original quality. Between iPhone and Android, it’s often rough. If you care about the details—like sports, fireworks, or baby toes—send it as a file or use an iCloud link. That’s what I do now.

    And hey, if your friend just wants a quick peek? A regular iMessage clip is fine. It’s fast, it plays right away, and you can still see the moment. Sometimes that’s all that matters.

    —Kayla Sox

  • I Tried Turning Images Into “Unicodes.” Here’s What Actually Worked

    I’m Kayla. I love when nerdy stuff looks cute. One rainy Saturday, I set a goal: turn my photos into little blocks, emojis, and braille dots. All text. No pixels. Sounds silly, right? But it’s fun. And it’s useful when I’m stuck in a terminal or making a funky slide. If you want the nitty-gritty play-by-play of my weekend experiment, I documented the full process in a separate write-up over here.

    I tested a few tools I’ve used before. I ran them on my old ThinkPad and my MacBook with Homebrew. I made a cat. A sunset. A coffee mug. Some things looked great. Some looked… like soup. Let me explain.


    What Do I Mean By “Images Into Unicodes”?

    I mean this: you feed a photo to a tool. It spits out text that looks like the photo. It uses Unicode symbols, like:

    • Block shapes (█ ▓ ▒ ░ ▀ ▄)
    • Braille dots (⠁ ⠂ ⠄ …)
    • Emoji (🟦 🌊 ☕)
    • Or plain ASCII (.,:;iI$@)

    Why do this? It loads fast. It works in a terminal. It looks artsy. Also, it makes people stop and smile.
    For a deeper dive into the nerdy compression theory behind all this, check out datacompression.info.


    Tool 1: Chafa — My Go-To For Clean Output

    I’ve used Chafa for years. If you want to peek under the hood, the project’s GitHub repo lives at hpjansson/chafa.

    How I ran it:

    # Mac
    brew install chafa
    
    # Linux
    sudo apt install chafa
    
    # Make it small and sharp
    chafa -s 80x40 --symbols=braille+block cat.jpg
    

    A tiny cat from my hallway photo (cropped and shrunk). This is a real snippet from my run:

    ⠸⣷⣦⡀   ⢀⣤⣾⠇
     ⠙⣿⣿⣷⣶⣾⣿⠋
      ⠈⣿⣿⣿⣿⠁
     ⢀⣾⣿⣿⣿⣷⡀
    ⣾⠟⠁⠈⠉⠙⠻⣷
    ⠁  ⢀⣤⣤⡀  ⠈
    
    • What I like: detail, nice edges, color support, very fast.
    • What bugged me: block characters can look “heavy” in some fonts. Light theme? The contrast can get weird.

    Pro tip: for terminals, I set a dark theme and a true monospace font. Nerd Fonts or JetBrains Mono works well for me.


    Tool 2: Emoji Mosaic — Loud, Fun, Great For Posters

    I used an emoji mosaic tool to remake a beach sunset I shot on my phone. It fills the image with emoji tiles. Super bright. Kinda goofy. But in a good way.

    My tiny sample (I scaled it way down):

    🟦🟦🟦🟦🟦🟦🟦🟦🟦🟦
    🟦🟦🟦🟦🟦🟦🟦🟦🟦🟧
    🟦🟦🟦🟦🟧🟧🟧🟧🟧🟧
    🟦🟦🟦🟧🟧🟧🟧🟨🟨🟨
    🟦🟦🟦🟧🟧🟧🟨🟨🟨🟨
    🟦🟦🟦🟦🟦🟧🟧🟧🟧🟧
    

    You see the sky turn orange. You see the “water” in blue. It felt like a sticker sheet. My kid pointed at it and went, “Whoa, pixels!” So yeah, it lands.

    • What I like: it pops on slides and posters. It’s playful. It works in chat too.
    • What bugged me: big files, slower in the browser, and screen readers hate it. Also, tiny emoji don’t print well. When size really matters—say you need the picture under a strict chat limit—check out this field test on shrinking photos to 15 KB; many of the tricks carry over.

    Tip: pick a small emoji set if you can. Too many types and the picture gets noisy.


    Tool 3: jp2a — Old-School ASCII That Just Works

    This one is simple and fast. For anyone hunting the source, it’s maintained at cslarsen/jp2a.

    How I ran it:

    brew install jp2a
    jp2a --width=60 coffee.jpg
    

    Here’s my little mug, from my desk at 7 a.m.:

       ( (
        ) )
      .------.
      | ☕   |
      |      |
      '------'
    
    • What I like: zero fuss, readable in plain text, good for docs.
    • What bugged me: less detail. Color works on some builds, but it still feels flat.

    If your image has sharp edges, jp2a looks better. Think logos, icons, or line art.


    Real Talk: What Worked Best For Me

    • For terminal art and README files: Chafa wins. It’s crisp with braille dots. I use it the most.
    • For slides and posters: Emoji Mosaic. It’s loud and fun. People remember it.
    • For quick checks or tiny servers: jp2a. It’s fast and very light.

    You know what? I sometimes combine them. I mock up with jp2a, then render clean with Chafa. For projects where ultimate fidelity at low bitrate trumps the terminal vibe, I’ve been dabbling with asymmetric gained deep image compression with continuous rate adaptation; it's wild but promising.


    Handy Tips So Your Output Doesn’t Look Mushy

    • Start with high-contrast photos.
    • Crop tight. Faces fill the frame. Big shapes read best.
    • Pick a width first (like 80 characters). Then test. Tweak only one thing at a time.
    • On macOS, some fonts squish braille. Switch to a true monospace font if dots look off.
    • Save your terminal theme. Light themes can wash out detail.

    If you’re starting from chunky TIFF scans, give them a quick squeeze first—this guide on compressing TIFF images saved me megabytes before I even opened Chafa.

    By the way, if you end up sharing your spicy Unicode art in adult-themed chat rooms or NSFW forums, it helps to know whether those platforms are actually safe and functional. I found this deep-dive review of Adult Friend Finder that lays out the pros, cons, and privacy settings in plain English: Is Adult Friend Finder legit? — it walks you through how the site’s messaging works, what costs to expect, and which features to toggle before you post anything risqué.

    And if you’d rather take the conversation offline and meet someone face-to-face, La Marque has a surprisingly tech-savvy adult scene where a bit of clever text art can break the ice; browse the La Marque escorts directory to see verified listings, bios, and availability schedules so you can skip the guesswork and connect with someone who matches your vibe.

    Small digression: I once tried a night shot of my cat behind a plant. It looked like a haunted salad. Don’t be me. Use light.


    A Tiny Sample Workflow I Actually Use

    This is how I made my Slack status look like a little me:

    1. Crop face to a square.
    2. Shrink it to 120 px wide.
    3. Run Chafa with braille + block.
    4. Paste the output into a code block.

    Commands:

    magick selfie.jpg -gravity center -crop 1:1 +repage -resize 120x selfie_square.jpg
    chafa -s 60x30 --symbols=braille+block selfie_square.jpg > me.txt
    

    I know, that uses ImageMagick for the crop step. It helps a lot. Clean in, clean out.


    Final Verdict

    • Chafa: best balance of detail and speed. My pick.
    • Emoji Mosaic: great for wow factor. Use it for slides, posters, or social.
    • jp2a: rock-solid for simple text
  • I Tried Block Compressed Sensing on Real Photos. Here’s My Take.

    You know what? I didn’t expect to like block compressed sensing this much. I used it for a small camera project and for some test images on my laptop. It’s not magic. But it’s handy. And a little weird in a good way.

    Quick idea, plain words: it chops a photo into small blocks (like 16×16 or 32×32). For each block, it grabs a few smart numbers instead of the whole block. Later, a solver guesses the full block back. That’s the heart of it.
    For a deeper dive into where block-level sensing slots into the wider universe of data reduction, swing by DataCompression.info for clear primers and tool rundowns.
    If you’d like the full mathematical treatment, this concise arXiv note lays out the core theory in detail (read it here).

    If you’d like to see my raw, day-by-day notebook from the very first time I pushed block compressed sensing on field shots—including all the code stumbles I cut from this summary—you can open the full lab diary here: my detailed BCS experiment log.

    I’ll share what I ran, what worked, what didn’t, and a few numbers I wrote down.

    My Setup (nothing fancy)

    • Laptop: MacBook Air M1, 16 GB RAM.
    • Tiny rig: Raspberry Pi Zero W with a small camera.
    • Tools I used: MATLAB with BCS-SPL and TV-based solvers, Python with PyTorch models (ISTA-style and a ReconNet port), OpenCV for blocking/unblocking. For denoise, I used BM3D and a light DnCNN model.

    For anyone hunting a broader survey of block-CS algorithm choices and reconstruction tweaks, this open-access overview in Algorithms is an excellent starting point (link).

    Block sizes I tried most: 16×16 and 32×32.
    Rates (how much I keep): 5%, 10%, 15%, 25%, 30%.

    Solvers:

    • OMP (fast, greedy, does okay on edges),
    • TV-based (smooths noise but can blur),
    • A plug-and-play loop with BM3D (cleaner look),
    • A learned model (ISTA-Net-ish) for speed.

    Color handling: I got better results sending the Y channel heavy and Cb/Cr light (YCbCr). When I sent RGB plain, I saw color speckle on low rates.

    After hammering on TIFF scans all week I found a few tricks—predictive tiling, palette hacks, and delta-RLE combos—that beat my old go-tos; the blow-by-blow is in this TIFF-centric deep dive if you ever need truly lossless workflows.

    Real Photos I Tested

    1) Sunset trees by my street (512×512 crop)

    • Setup: 32×32 blocks, 25% rate, Bernoulli matrix, OMP rebuild, BM3D light pass
    • Notes: Roof lines looked sharp. Leaves? Kind of mushy. The sky got slight banding. The tree trunk was solid though.
    • My quick metrics: PSNR ~29.6 dB, SSIM ~0.88
    • Feel: Nice if you don’t pixel-peep. If you do, you’ll see the grid a bit.

    2) Brick wall with my old bike (lots of texture)

    • Setup: 16×16 blocks, 10% rate, TV solver
    • Notes: Tough scene. Bricks made a checker vibe. Edges looked okay near the bike frame, but brick detail broke down. Noisy grout turned smooth and odd.
    • Metrics: PSNR ~24.1 dB, SSIM ~0.78; with BM3D after, SSIM nudged to ~0.82 but got softer
    • Feel: This shows the weak spot—fine texture at low rates.

    3) Park from a small drone (downscaled to 512×512)

    • Setup: 32×32 blocks, 15% rate, partial Hadamard (fast), TV solver on laptop
    • Time: ~1.6 s per frame on CPU
    • Notes: Paths and benches looked clean. Grass looked patchy. Clouds smeared a bit, but not awful.
    • Metrics: PSNR ~27.8 dB, SSIM ~0.86
    • Feel: For scouting and saving bandwidth, I’d keep it.

    4) My cat on the couch at night (ISO noise galore)

    • Setup: 32×32 blocks, 30% rate, PnP with DnCNN
    • Notes: Fur kept shape. Whiskers held up better than I thought. Low light noise dropped. The lamp glow kept its mood.
    • Metrics: PSNR ~31.3 dB, SSIM ~0.91
    • Feel: This one made me smile. Looked natural.

    5) Raspberry Pi cam, slow Wi-Fi at my aunt’s place

    • Setup: 32×32 blocks, ~15% rate, fast Walsh-Hadamard on the Pi, send blocks as packets; rebuild on my laptop with OMP + BM3D
    • Bandwidth: cut to about one-sixth of a JPEG at the same visual level (for these scenes)
    • Quirk: A few packets dropped. Only those blocks got hit. The rest stayed fine. I kind of liked that—damage stays local.
    • Feel: For spotty Wi-Fi, this was the win.

    What I Liked

    • Capture side is cheap: the Pi just did a few fast transforms and sums. No heavy math there.
    • Works well on smooth stuff: skies, walls, skin tones (unless you push the rate too low).
    • Block-local faults: lose a packet, lose a block. The whole photo doesn’t go down.
    • You can go fast with Hadamard: no huge random matrices to store.

    What Bugged Me

    • Blocks can show: grids pop up at low rates, even with post-cleaning.
    • Fine texture suffers: leaves, bricks, fabric weave—these are hard.
    • Rebuild time adds up: on CPU, the nicer solvers are slow. Learned models help, but they need training.
    • Color can get weird: if you compress RGB straight, low rates get color noise. YCbCr helped.
    • Tuning matters: block size, rate, solver, and denoise all fight each other a bit.

    When I pushed aggressive settings—aiming for sub-15 kB social-media shots—this separate project on shrinking photos to 15 kB taught me a few survival tricks that carried back into my BCS presets.

    My Settings That Landed Well

    • 32×32 blocks for general use. 16×16 if memory is tight or motion is small.
    • 25–30% rate for “looks good” photos. 10–15% for scouting or low-stakes shots.
    • Partial Hadamard for sensing. It’s fast and light.
    • Rebuild with PnP + BM3D when I want clean lines, or a small learned model for speed.
    • For color, sense Y heavier than Cb/Cr, then balance in the end.

    Small Digression: Why I Even Tried This

    I needed to send yard photos over slow Wi-Fi, so my kid could check if the dog was back at the door. JPEG was okay, but the Pi choked when the signal dipped. With blocks, when a packet got lost, only that square turned soft. The dog’s face stayed clear. That sold me more than any chart.

    On a totally different note, the same low-footprint tricks that keep my Pi stream usable also apply when you’re hanging out on bandwidth-starved webcam platforms looking to keep things playful. If that’s you, swing by this practical guide to navigating free chat sites for no-nonsense advice on etiquette, safety, and tech tweaks so you can focus on chemistry instead of troubleshooting.

    Prefer to swap the pixels for real-world company instead? Triangle-area locals can browse the carefully vetted companions over at Fuquay escorts for up-front info, photos, and booking details that make arranging an in-person meetup as effortless as clicking send.

    For moments when I feel like embracing the opposite extreme—shuffling pixels into wild symbol art—here’s the recap of my Unicode image experiment; it’s pure fun but surprisingly instructive about perceptual redundancy.

    Who It Fits

    • Edge cameras, drones, low-power rigs.
    • Folks who like tinkering with math and images.
    • Not the best pick for art prints or heavy texture work. You’ll see the grid.

    Curious about codecs that flip the compute balance—lightweight encoders but beefier decoders? My field notes on **[asymmetric gained deep image compression with continuous rate adaptation](https://datacompression.info/i-tried-asymmetric-gained-deep-image-compression-with-continuous

  • I Compressed Big Videos With VLC: My Real-World Steps (And What Actually Worked)

    I had to send a birthday video to my mom. Her email kept yelling “file too big.” Classic. I didn’t want to install a bunch of new stuff. I already use VLC to watch movies, so I thought, can I just shrink this in VLC? Short answer: yep. And it didn’t make me cry.

    If you’d like to see every knob I twisted during my very first marathon session, I kept a play-by-play over on I Compressed Big Videos With VLC: My Real-World Steps (And What Actually Worked).

    I’ve used this now for phone clips, screen recordings, and a messy soccer game. Here’s how I did it, what looked good, and what bugged me a bit too.


    My Setup (Nothing Fancy)

    • Laptop: Windows 11, Core i5, 16 GB RAM
    • VLC: Version 3.0.20 (the standard download)
    • I also tested one video on my old MacBook Air. It worked the same, but it ran a little warm.

    I’m not a video engineer. I make videos for family, school nights, and YouTube how-tos. I care about size and “does this look okay on a phone.”


    The Quick Steps I Use in VLC

    Let me explain how I shrink a video in VLC. It sounds like a lot, but after two runs, your hands will do it without thinking.

    1. Open VLC.
    2. Click Media > Convert/Save.
    3. Click Add and pick your video.
    4. Click Convert/Save at the bottom.
    5. In Profile, pick: Video – H.264 + MP3 (MP4).
      • This gives you a simple MP4 that plays almost everywhere.
    6. Click the little wrench icon next to the profile to tweak:
      • Encapsulation: MP4/MOV
      • Video codec: check “Video,” set Codec to H-264
        • Bitrate: set a number (I’ll share numbers below)
        • Frame rate: 30 for most videos, 60 for sports
      • Resolution: set width and height if you want to downsize (1920×1080 or 1280×720)
      • Audio: Codec AAC (or MP3), 128–160 kb/s is fine
    7. Click Save.
    8. Pick a Destination file (add “-small” to the name so you know).
    9. Hit Start. Go stretch or grab a snack. The fans may hum.

    Tip: Do a 20-second test first. Clip a short part of your video and try those settings. Saves time and headaches. Need granular explanations for each field? The official VLC documentation walks through every codec toggle and advanced option.


    Real Example 1: iPhone Birthday Clip

    • Source: iPhone 13 Pro, 4K at 30 fps, 2:42 long, MOV file, 722 MB
    • Goal: Email it without drama

    What I set:

    • Profile: H.264 + MP3 (MP4)
    • Resolution: 1920×1080 (I stepped down from 4K to 1080p)
    • Frame rate: 30
    • Video bitrate: 3000 kb/s
    • Audio: AAC at 160 kb/s

    Result:

    • New file: 73 MB
    • Time to convert: 1 minute 20 seconds
    • Look: Still sharp, colors looked normal. Faces looked clean. When my niece spun around, her hair had a tiny bit of blur. I only noticed because I went looking for it.

    Did it send? Yes. My mom watched it on her phone, grinned, then asked for more clips. Of course.


    Real Example 2: Screen Recording for YouTube

    • Source: OBS screen capture, 1080p at 60 fps, 12:05 long, MKV file, 1.9 GB
    • Goal: Get a smaller file for faster upload

    What I set:

    • Resolution: 1920×1080 (kept it)
    • Frame rate: 30 (screen stuff doesn’t need 60 for me)
    • Video bitrate: 2000 kb/s
    • Audio: AAC at 128 kb/s

    Result:

    • New file: 281 MB
    • Time to convert: 7 minutes 50 seconds
    • Look: Text stayed clear. Cursor trails looked fine. When I scrolled fast, it got a touch soft for a split second. But honestly, no one in the comments noticed.

    Upload to YouTube was smoother. No coffee refill needed while it crawled.


    Real Example 3: Soccer Game at 60 fps

    • Source: GoPro Hero 8, 1080p at 60 fps, 15:10 long, MP4 file, 5.4 GB
    • Goal: Keep smooth motion, cut the size way down

    What I set:

    • Resolution: 1920×1080 (kept it)
    • Frame rate: 60 (sports needs it)
    • Video bitrate: 3500 kb/s
    • Audio: AAC at 160 kb/s

    Result:

    • New file: 416 MB
    • Time to convert: 14 minutes 30 seconds
    • Look: Motion felt smooth. The grass looked a bit mushy in wide shots. Faces were fine in close plays. For sharing with the team, it did the job.

    I watched it on my TV and my phone. On the TV, the grass mush was easier to spot. On the phone, it looked great.


    So… Did It Actually Look Good?

    Most of the time, yes. If I keep 1080p and use a fair bitrate, folks can’t tell. They just watch and move on. If I push bitrate too low, you start to see blocky areas in busy parts, like confetti, water, or grass. That’s the trade-off.

    Those blocky glitches—better known as video compression artifacts—are a rabbit hole I’ve fallen down before, and I wrote an entire piece on what it’s like living with them day to day.


    The Bitrate Numbers That Worked For Me

    • 720p at 30 fps: 1200–1800 kb/s
    • 1080p at 30 fps: 2000–3500 kb/s
    • 1080p at 60 fps (sports): 3000–5000 kb/s

    Audio:

    • Voice or screen: 128 kb/s AAC
    • Music or events: 160 kb/s AAC

    If you’d like to geek out on what those bitrates really mean under the hood, check out DataCompression.info for plain-English guides and calculators.

    These are not fancy rules. They just worked for my clips. If I needed it smaller, I lowered resolution to 720p first, then nudged bitrate down.


    Little Tricks That Helped

    • Do a short test encode first. Saves time.
    • Keep 60 fps for sports; drop to 30 for talking or screen stuff.
    • If your player looks weird, stick with H.264. H.265 can be smaller, but some old TVs don’t like it.
    • Name files with the settings in the name, like “bday-1080p-3mbps.mp4.” Helps later.
    • Don’t mess with fancy filters unless you know why. I left them alone. Fewer surprises.

    Stuff That Bugged Me

    • Menus feel hidden. Convert/Save isn’t where my brain expects.
    • Presets are thin. I wish there were clear “1080p small” or “720p tiny” presets.
    • Changing frame rate sometimes caused audio to drift on one long clip. Keeping the same frame rate fixed it.
    • It’s CPU-heavy. My laptop fans woke up. On my Mac, it ran warm too.
    • The progress bar feels slow and vague. It finishes when it finishes.

    When I Wouldn’t Use VLC

    If I need fine control, batch jobs, or the best quality per byte, I use HandBrake. It has more presets and clearer sliders. For a quick shrink with software I already have, VLC is still my go-to. It’s free, fast to start, and safe.

    For a head-to-head comparison of VLC, HandBrake, and a few other contenders, I documented the entire bake-off in I Tried the Best Video Compression So You Don’t Have To.

    If you’re curious how compression and smooth streaming play out in the live-cam world—where performers can’t afford choppy video—a quick read of Which site has the hottest live cam girls? breaks down the leading cam platforms, highlights the video quality each one pushes, and helps you pick a site that keeps the picture crisp without burning through your bandwidth. Likewise, maybe you’re prepping a short, polished intro reel for a local companionship agency and need to see what top-tier presentation looks like before you hit “export.” The directory at University Place Escorts showcases reputable companions with professionally shot photos and videos, giving you real

  • Compress Image to 4MB: My Real-World, First-Hand Review

    I’m Kayla, and I’ve fought the “file too big” monster more times than I can count. Last month, my kid’s school portal kept yelling at me. My photo was 5.3 MB. The limit was 4 MB. Classic.
    If you’d like to see how someone else tackled that same 4-megabyte ceiling, there’s a detailed, step-by-step breakdown in this real-world deep dive.

    Why 4 MB, though?

    Lots of sites set a cap. Etsy, WordPress themes, event portals, job sites, even apartment apps. My real estate client uses 4 MB too. It’s a common number, like a stubborn door that almost fits your box. Even adult-oriented listing platforms enforce similar limits—if you're prepping portfolio shots for the Clearfield escorts directory you’ll see plenty of snappy, fast-loading images that prove you can stay within 4 MB without sacrificing allure.

    The gear I used (for real)

    • MacBook Air (M2), macOS Sonoma
    • A Windows 11 laptop from work
    • iPhone 13, and an old Android phone for kicks

    And the tools I leaned on:

    • TinyPNG (great for PNGs and flat art)
    • Squoosh (Google’s tool with fine control)
    • ImageOptim on Mac (batch and fast)
    • Photoshop “Save for Web” (old but solid)
    • macOS Preview “Export” (shockingly handy)
    • Windows Photos “Resize” (simple and quick)
    • Photo & Picture Resizer on Android (works on the go)

    I’ve used these in my day job with client photos and in normal life. Not a lab test. It’s me, sitting on a couch, trying to make stuff work.

    Real examples, real numbers

    • DSLR Photo, family picnic

      • File: 6000×4000, JPEG, 12.8 MB
      • Goal: under 4 MB for a church site
      • Tool: Squoosh, MozJPEG (a smart JPEG saver), quality ~72, resize width to 3000
      • Result: 3.3 MB
      • Notes: Faces looked clean. Light banding in the blue sky if I stared hard. Nobody else noticed.
    • Product shot, white background

      • File: 4000×4000, PNG, 18.1 MB
      • Goal: shop upload under 4 MB
      • Tool: TinyPNG
      • Result: 2.6 MB
      • Notes: Edges stayed sharp. Whites stayed white. This was a win.
    • Screenshot with tiny text

      • File: 2880×1800, PNG, 8.7 MB
      • Goal: email under 4 MB
      • Tool: TinyPNG first, then Squoosh to try JPEG too
      • Result: TinyPNG PNG: 0.9 MB; JPEG: 0.6 MB but fuzzy text
      • Notes: I kept the PNG. Text stayed crisp. For UI stuff, PNG beats JPEG.
    • Phone photo, HEIC (iPhone 13)

      • File: 4032×3024, HEIC, 2.1 MB
      • Goal: already under 4 MB, but site wanted JPEG
      • Tool: macOS Preview → Export as JPEG, quality High
      • Result: 1.4 MB
      • Notes: Colors matched. Easy.
    • Food blog shot, moody lighting

      • File: 5500×3667, JPEG, 9.6 MB
      • Goal: under 4 MB for WordPress
      • Tool: Photoshop → Save for Web (JPEG, 75% quality, resize width 2560)
      • Result: 1.9 MB
      • Notes: Looks pro. No weird halos around the plate. This is my go-to for blog stuff.
    • Batch compress, 40 wedding photos

      • Files: mix of 5–12 MB JPEGs
      • Goal: share set under a slow hotel Wi-Fi
      • Tool: ImageOptim on Mac, quality ~80, strip metadata
      • Result: most files 1.2–3.8 MB
      • Notes: Super fast. Lost GPS data, which I wanted gone anyway.
    • Quick fix on Windows

      • File: 4608×3456, JPEG, 7.4 MB
      • Goal: upload under 4 MB for a grant form
      • Tool: Windows Photos → Resize → “Large” (2560-wide)
      • Result: 1.7 MB
      • Notes: Not fancy, but it just worked.
    • Android on the go

      • File: 3000×4000, JPEG, 6.2 MB
      • Goal: send under 4 MB over spotty data
      • Tool: Photo & Picture Resizer → set width 2048
      • Result: 1.3 MB
      • Notes: Good enough. A bit soft, but clean.

    By the way, if you’re curious about fancier math-heavy tricks, you can read about how block compressed sensing held up on real photos—it’s a fascinating but at times quirky approach.

    What surprised me

    I thought PNG was always huge. Not true. TinyPNG made my flat art tiny and sharp. But I also thought JPEG would win every time for photos. Then a sky gradient got blotchy at too low quality. I bumped it up two clicks, and it looked fine. So yes, I contradicted myself. I care about how it looks, not just the number.

    You know what else? Resizing did more than “quality” most days. Cutting that width from 6000 to 3000 changed everything.

    My simple rule of thumb

    • Photos of people, places, food: use JPEG, resize width to 2560–3000, set quality near 70–80.
    • Screenshots, logos, UI, charts: keep PNG. Use TinyPNG to shrink.
    • If a site allows it, WebP can be even smaller. Some sites still don’t take it, though. I check first.

    Tiny jargon, plain talk

    • Metadata: hidden info like camera and GPS. Many tools remove it. Smaller size, more privacy.
    • Color profile: keeps colors true (sRGB is common). If colors shift, check this setting.
    • Artifacts: little blocks or fuzz. You’ll see it first in skies and fine lines.

    For a deeper nerd-level explainer on how those compression voodoo tricks actually shave off kilobytes, check out the concise primers at datacompression.info.
    For ultra-minimal icon sets, I even flirted with converting tiny icons into Unicode characters; the full experiment is documented here.

    Speed and privacy

    • Online tools (TinyPNG, Squoosh) are super easy. I use them when I don’t worry about the image being seen by a third party.
    • Offline tools (ImageOptim, Photoshop, Preview) feel safer for client work. Also handy on planes or bad Wi-Fi.

    And if you’re sitting on piles of heavyweight TIFF scans, you’ll appreciate this week-long TIFF compression field test that shows which levers really matter.

    Tiny workflows I actually use

    • Mac one-off: Preview → Export → JPEG → quality slider → set width → save.
    • Batch on Mac: Drop a whole folder into ImageOptim, wait a minute, done.
    • Tough photo: Squoosh → try MozJPEG at 72 → resize to 3000 px → check sky and faces.
    • Windows quick fix: Photos app → Resize → Large.
    • Phone share: On iPhone, edit → crop a little → share as JPEG; or later convert in Preview.

    What I didn’t love

    If you think 4 MB is tight, try hitting 15 KB—this extreme compression challenge chronicles the highs and lows.

    • Heavy JPEG crush made skies look crunchy. I had to nudge the slider up.
    • Some online tools queued me when the site was busy.
    • A logo exported as JPEG looked smudged. PNG saved it.

    Favorites (short and sweet)

    • Best for PNGs and flat art: TinyPNG
    • Best control for hard cases: Squoosh
    • Fast batches on Mac: ImageOptim
    • Quick no-frills: macOS Preview and Windows Photos
    • Polished work: Photoshop Save for Web

    Final take

    Hitting 4 MB isn’t hard once you know the moves. Resize first. Then set quality. Pick JPEG for photos, PNG for text or UI, and WebP when the site allows it. I keep my originals safe in a folder, then make a “web” copy.

    And when the upload gate says “too big,” I smile a little now. I’ve got a fix for that.

    Need something even smarter than sliders and presets? Check out [this hands-on with asymmetric-gained deep image compression that adapts its bitrate on